Showing posts with label printmaking. Show all posts

Monday

Third grade- block printed pillows


Over several weeks, students learned and practiced the art of block printing. Inspired by the artist of Block Shop Textiles, students planned and designed blocks that contained shapes and were symmetrical. A block is a carved surface similar to a stamp. Students practiced printing their blocks on paper to become familiar with the process.  


After mastering this practice, students created prints on fabric using textile ink. Students then learned and practiced sewing a simple seam using the blanket stitch.

Once finished, students learned about traditional Japanese resist dyeing called shibori.  Shibori is a style of fiber art that uses wooden block to create pressure on the fabric. This pressure resists the dye and creates controlled patterns on the fabric. When dry, students stuffed and hand sewed the pillows together.


Tuesday

First Grade - Love

Love Prints


Check out these LOVEly art projects created by the first graders!

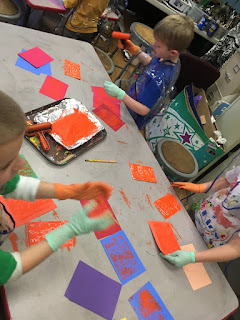
In these art projects students learned the process of printmaking. Students created a stamp using foam. With a pencil, the foam was indented creating a pattern. A pattern is a design that repeats and never changes.  Then students used a brayer to roll ink across the stamp. Once inked the stamp is pressed onto a paper. Student repeated this process several times until they successful printed four pages. Students then collaged their prints and patterned letters onto a background paper.


Thursday

5th Grade Gelatin Printing

Gelatin printing is a form of monoprinting in which a gelatin slab is used as a printing 'plate' in along with  standard water soluble printing inks to create images. We used tempra paint to create our prints. When textures and stencils are applied to the plate it leaves marks on the inked plate. Overlapping multiple colors and textures allow for the prints to become more and more interesting.


TRY THIS AT HOME 

You can use any shallow container.  

We used these 25oz. containers from Stop and Shop.

You want your gelatin plate to be about 1/4 thick, so for these containers we used the following recipe:

  • 1/2 cup glycerine (you can find a small bottle at CVS or a large one online)
  • 2 tbsp unflavored gelatin
  • mix the gelatin and glycerine together, then add
  • 1/2 cup boiling water
Stir gently to avoid making bubbles. Let your gelatin harden overnight, or speed up the process in the refrigerator. If your plate breaks while you are using it, simply wash off any extra paint and pop the jello in your microwave for about one minute.  Allow it to harden before you use it again.  Because of the glycerine, these plates will last for months without refrigeration.